We’ve all heard the expression “There is no off-season” but for those women new to the sport and hobby, that statement can be daunting. What does hunting season prep look like for the average bowhunter?
If you’re lucky enough to live in a game-rich area, “fall prep” is likely top of mind year-round. As an eastern hunter, we have a limited season focused primarily on whitetails – so this blog post zeroes in on that.

Off-Season Prep for the Bowhunter
Shooting Prep
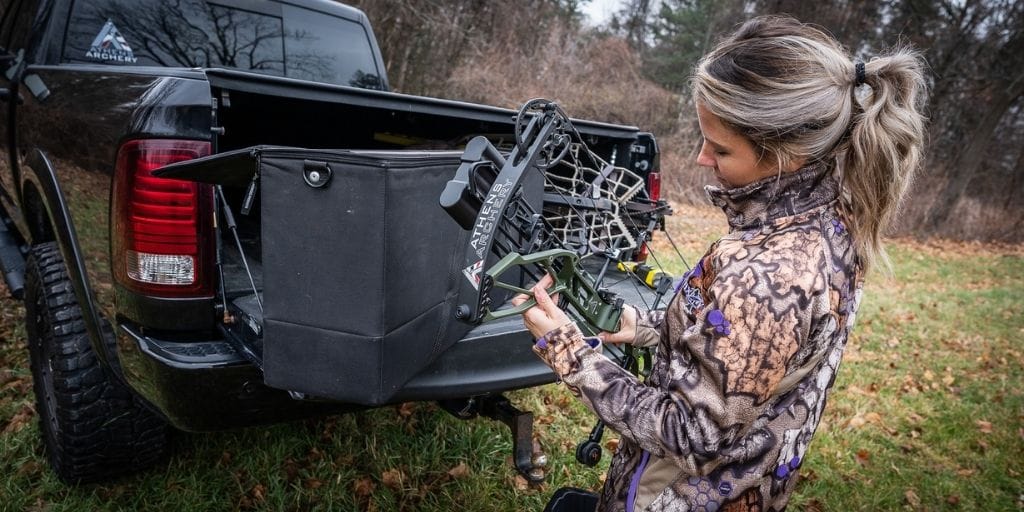
Sight in your bow. And not a week before October – break it out and break it in during spring. It’s so important to be comfortable with the weapons and equipment you take into the field, I can’t stress that enough. Whether you’re pulling out the bow you’ve been hunting with for five seasons or a brand-new rig, it’s wildly important to know that piece of equipment inside and out. Be sure you’re dialed into 20-30-40-50 and any distance beyond where you feel you can take and execute an ethical shot.
I tend to focus of my shooting practice around 40-45 yards, while my hunting scenarios typically yield 20-30 yard shots. Why? Smaller targets are harder to hit, so when that deer is 20 yards closer, I feel even more confident aiming at a larger area.
Read More: Are You a Member of Your State’s Bowhunters Association?
Work that anchor point. Work on drawing your bow slowly and smoothly. If your bow is hard to draw, start your target shooting at a lower draw weight and work yourself up
Drill. Drill. Drill. From blind bale shooting to long-distance target shooting, getting comfortable in nearly every shooting circumstance is important. Shoot in the wind. Shoot in the rain. Shoot when it’s cold. Shoot when it’s dark. Shoot seated, standing, leaning over, and shoot with limited and narrow lanes to mimic that super un-ideal situation that you *know* is bound to happen – because nothing ever goes how it should. Another big one – shoot in your hunting gear. Break out the gloves, hats, gaiters, and every other accessory you might wear afield and put it on. You’d be surprised how much your anchor point changes wearing these things.
If you have access to a treestand to target shoot from I highly recommend utilizing it. A lot of people forget when they’re target shooting that you’re often working with an 18-24” tiny platform up in that tree. An elevated shooting position is just as helpful (grab a ladder or shoot from a second-story window). I see a lot of bowhunters posting photos practicing from the same spot all summer long, and then they get into a ground blind, shooting house, or even a treestand, and the shooting scenario is changed completely. While you’re up there, get to full draw on every animal that moves. Practice aiming, practice slowing your breathing (disclaimer: just don’t pull the trigger if your state doesn’t allow it).
You hear “I couldn’t stand up fast enough” or “he was behind a tree” – the excuses are endless (hey, we’ve all been there). Not to say that these situations can all be avoided, but knowing your bow, knowing your hunting situation – you can work to prevent a lot of heartache down the road. Sometimes, you’re going to have to squat to get that shot off, or maybe you’ll need to drop to a knee. Sometimes, that hang-on platform your buddy puts you in 25 ft. off the ground makes you want to rethink breakfast the next day – put yourself in these situations and practice in them before the season starts. You’ll thank yourself later.
Stress test. You’ve probably seen the hilarious, and somewhat ridiculous, stress tests people go through to overcome target panic (like having people screaming in their faces while they shoot or having things thrown at them while they settle their pin), but I have a slightly more practical test I put myself through prior to season.
We all know that feeling. You hear the crunch of leaves from that colony of 200 lb. squirrels all morning – then – the woods present the swift whispers of a hoof hitting the ground. And then another. A twig snaps and immediately, your heart starts to race. That’s an adrenaline rush that’s nearly impossible to replicate. As part of my pre-season prep and target shooting regimen, I’ll get my bow set up ready at 40-45 yards and run a mile. I end the mile at my bow and start shooting. If you’re more in shape than me (I envy you) and a mile won’t do it – run however long it takes to elevate your heart rate. I work through that draw cycle, ensuring I’m executing a smooth, slow pull, and then I work to calm my heart rate and aim.
Field Prep
Walk the woods. March and April are some of my favorite times to walk through the woods. There may still be a dusting of snow, which makes finding fresh trails (sheds, too!) that much easier – and more efficient. With the woods clear, get a feel for the layout (especially if it’s a new property you’ll be hunting). Find the easiest ways into key transition spots and memorize them. Clear trails and set up trail cameras – as early as spring.
Read More: What’s In My Solo Hunting Pack
Know your stand locations in the dark. I know a lot of women are hesitant not only to go into the woods alone, but to go in when it’s dark. I ride this struggle bus, mostly because I’m awful at seeing in the dark, and I’m clumsy as hell. Know your routes (from all directions to play the wind) and mark them if you must. Count your steps, find landmark objects, and walk those paths in the dark prior to the season.
Get out of the woods. A few weeks before you plan to hunt hard, get out of the woods. Let your spots sit and be calm. But before you do – get up in your stands and ensure everything is as it should be. That your stands are safe, that your shooting lanes are clear.
Prep your hunt pack. Don’t wait until the night before the opener to run through your hunt pack checklist. Get your gear in order and memorize where everything is in the dark, so you can quietly and quickly grab things as needed. Here are my essentials: binos, range finder, extra release, field dressing knife, zip ties, a sharpie, field wipes and of course… Little Debbie Cosmic Brownies.


This is fantastic! Thank you so much . I have an old magazine article that I dust off a few times before bow season. Just to brush up on certain things. I enjoyed reading this so much more! Definitely coming back to read this a few more times. Thank you!
Beautifully written. Could visualize the things you were talking about. Every new female hunter should read this.